Hey everybody, I am a collector of old stuff...so, you can't imagine how happy I was when I found reverse glass painting in an antique store the other day. Reverse glass painting has been around since the middle ages in one form or another. This piece is a vintage piece from the 30's or 40's and based on the subject matter, may have been created by a local artist.
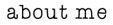
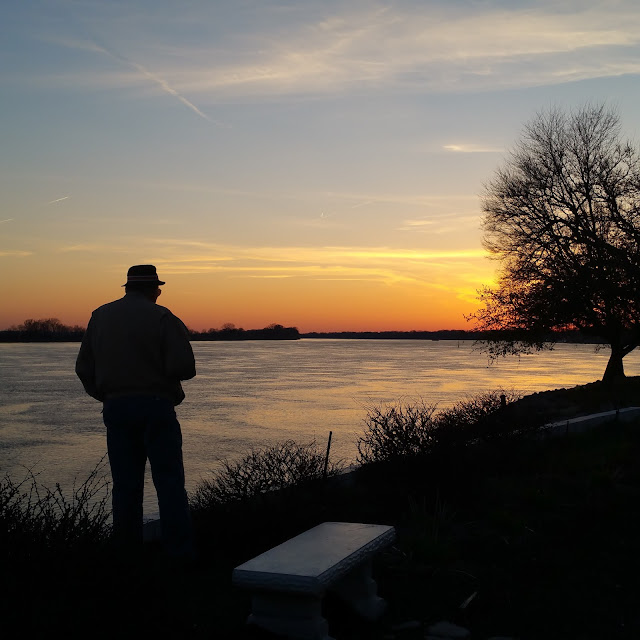
I really loved the image...it's like so many images I photograph while walking on the river near my home.
And, although the "crinkled" aluminum foil background is typical for pieces created during the 30s and 40s, I felt like it needed something more. I really wanted to see this piece with a magnificent sunset behind it.
I really love that silhouette image, I see it quite often when I'm walking near the river.
So I decided that it would be great to use Color Burst to create a wonderful, watercolor background that would capture some of the beauty of our sunsets.
First, I removed the tiny nails from the frame that held the foil background in place.
Then carefully removed the backing and the foil back ground. I discovered that this was a "at home" DIY piece...the mat board on the reverse side was actually a phone book cover.
Here's close up of the foil once the piece had been deconstructed. There were a couple different kinds of foil, and it looks like they had some color, but the color has faded away over the years.
The next thing I needed to do was to create a Color Burst color palette that would, approximate the colorful sunsets I see outside my front door nearly every day.
I chose, Cerulean Blue Ultramarine Blue, Lemon Yellow, Gamboge, Orange, and Merlot. That's a lot of color for an 8x10 background...but I wanted it to be very colorful!
So I created a loose, "washy" background with lots of color. I didn't really try to catch any detail on this background. The details are in the painted glass that overlays this background so you can be messy.
When I reassembled this piece with it's new Color Burst background...I loved it even more. The sunset is so glowy!
If you like this project, make sure to check back in a couple days...I recreated a similar vintage reverse glass painting with a frame from a resale shop, stencils, and Color Burst.
Til next time,